Developers at Baiyu Wubing, creator of a blog site built to help low-level developers using Cocos Creator, created a great introduction to the use of shaders for Cocos Creator 3.1.0 to implement "Shader that effects pictures when hovered over by the mouse." We have translated the blog post for our English developers.
People often ask me how to study shader. In fact, I don’t know much. I recommend a few online learning websites that I have used to help me learn.
- https://thebookofshaders.com/
- https://webglfundamentals.org
- https://learnopengl-cn.github.io/ (Chinese)
After understanding some concepts (vertex shader, fragment shader, uniform/glsl syntax, built-in functions, UV coordinates), I started to refer to Cocos official documents and forum posts.
This tutorial will talk about turning a searched shader into our own shader for Cocos Creator with a similar effect.
This demo uses the Cocos Creator 3.1 version. After reading it, I believe you can port it to any other version after 3.1!
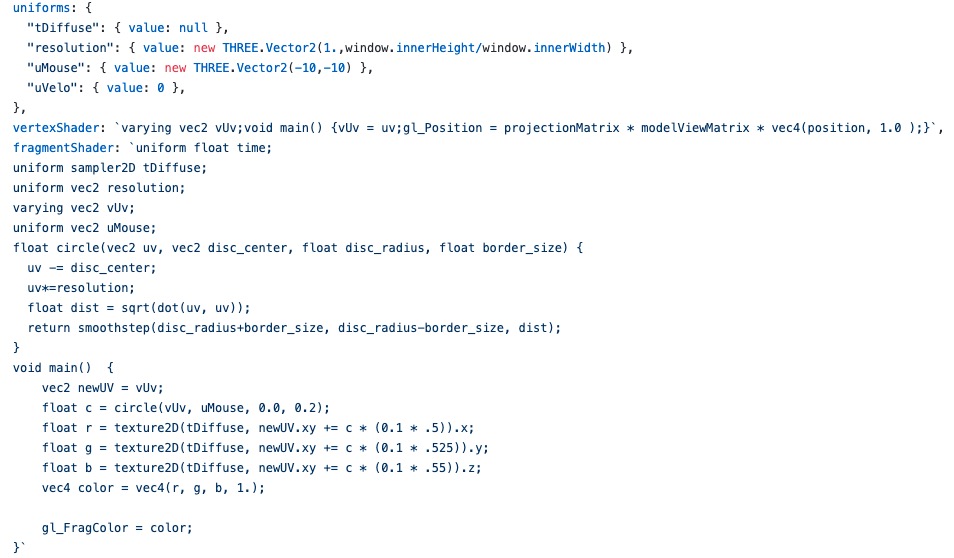
The source code for the shader reference is found here:
https://github.com/akella/webgl-mouseover-effects/blob/master/js/step1.js
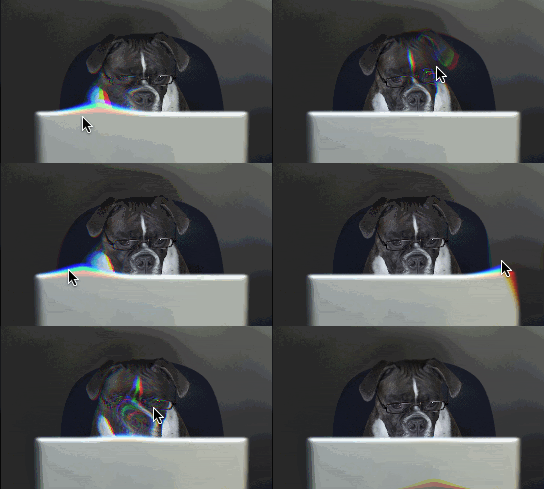
What we will accomplish
This implementation is divided into the following three steps:
- Create a template
- Basic realization
- Script control
Create a template
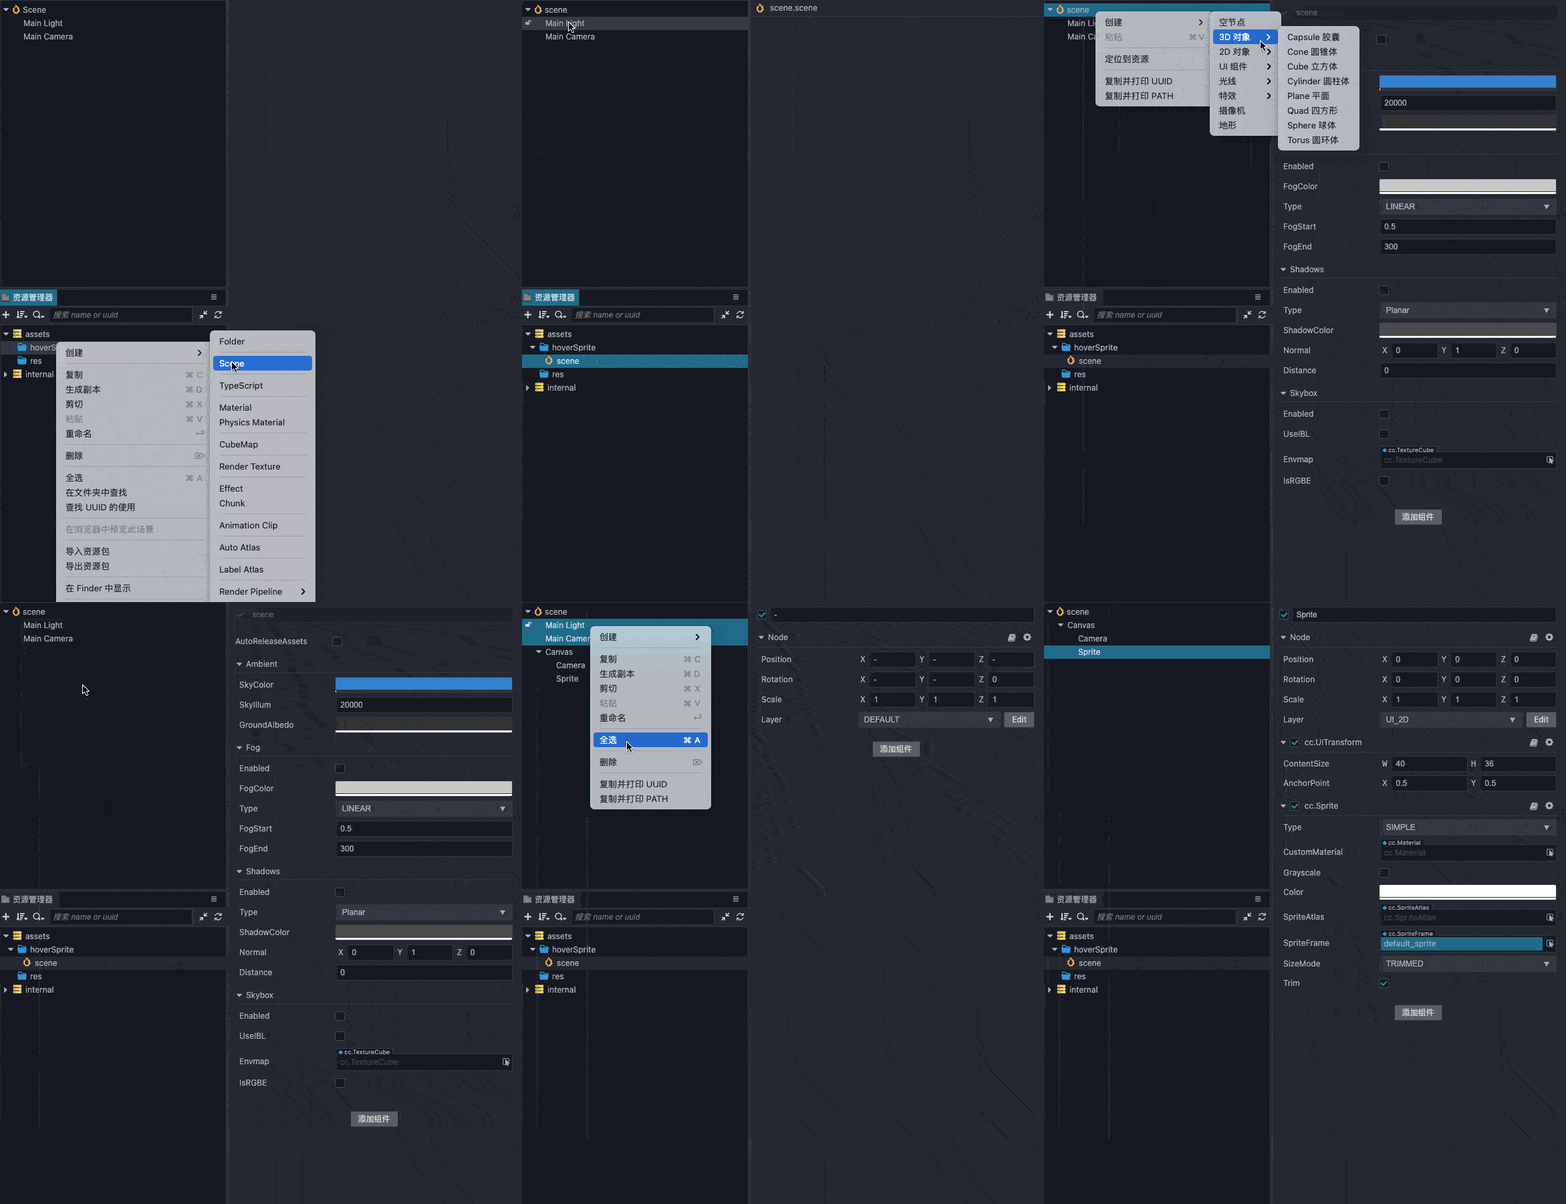
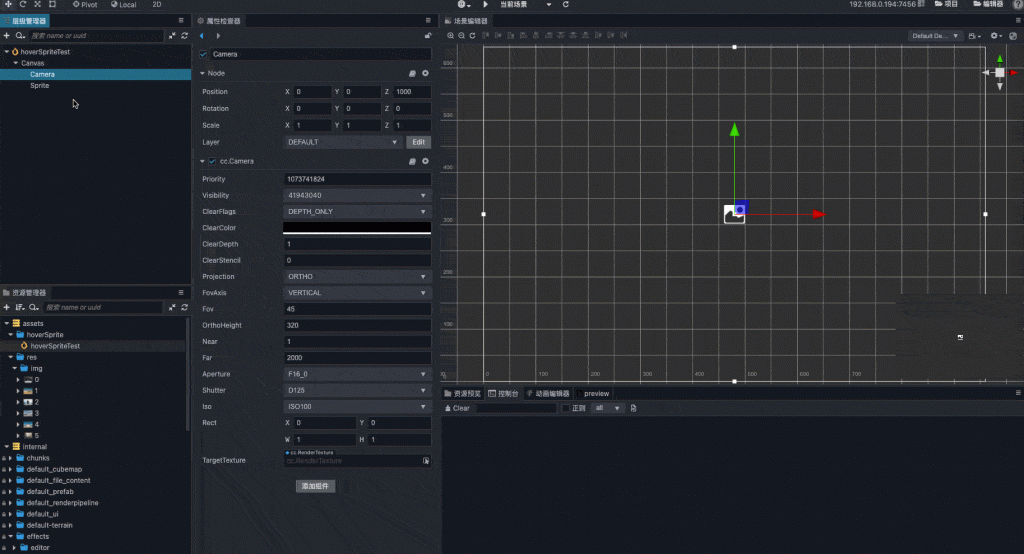
Create a new scene named hoverSpriteTest, add a 2D sprite node to the scene, and delete the 3D camera and light.
Drag in the image resource from our project file, change the type to sprite-frame, and untick the Packable option (convenient for UV calculation).
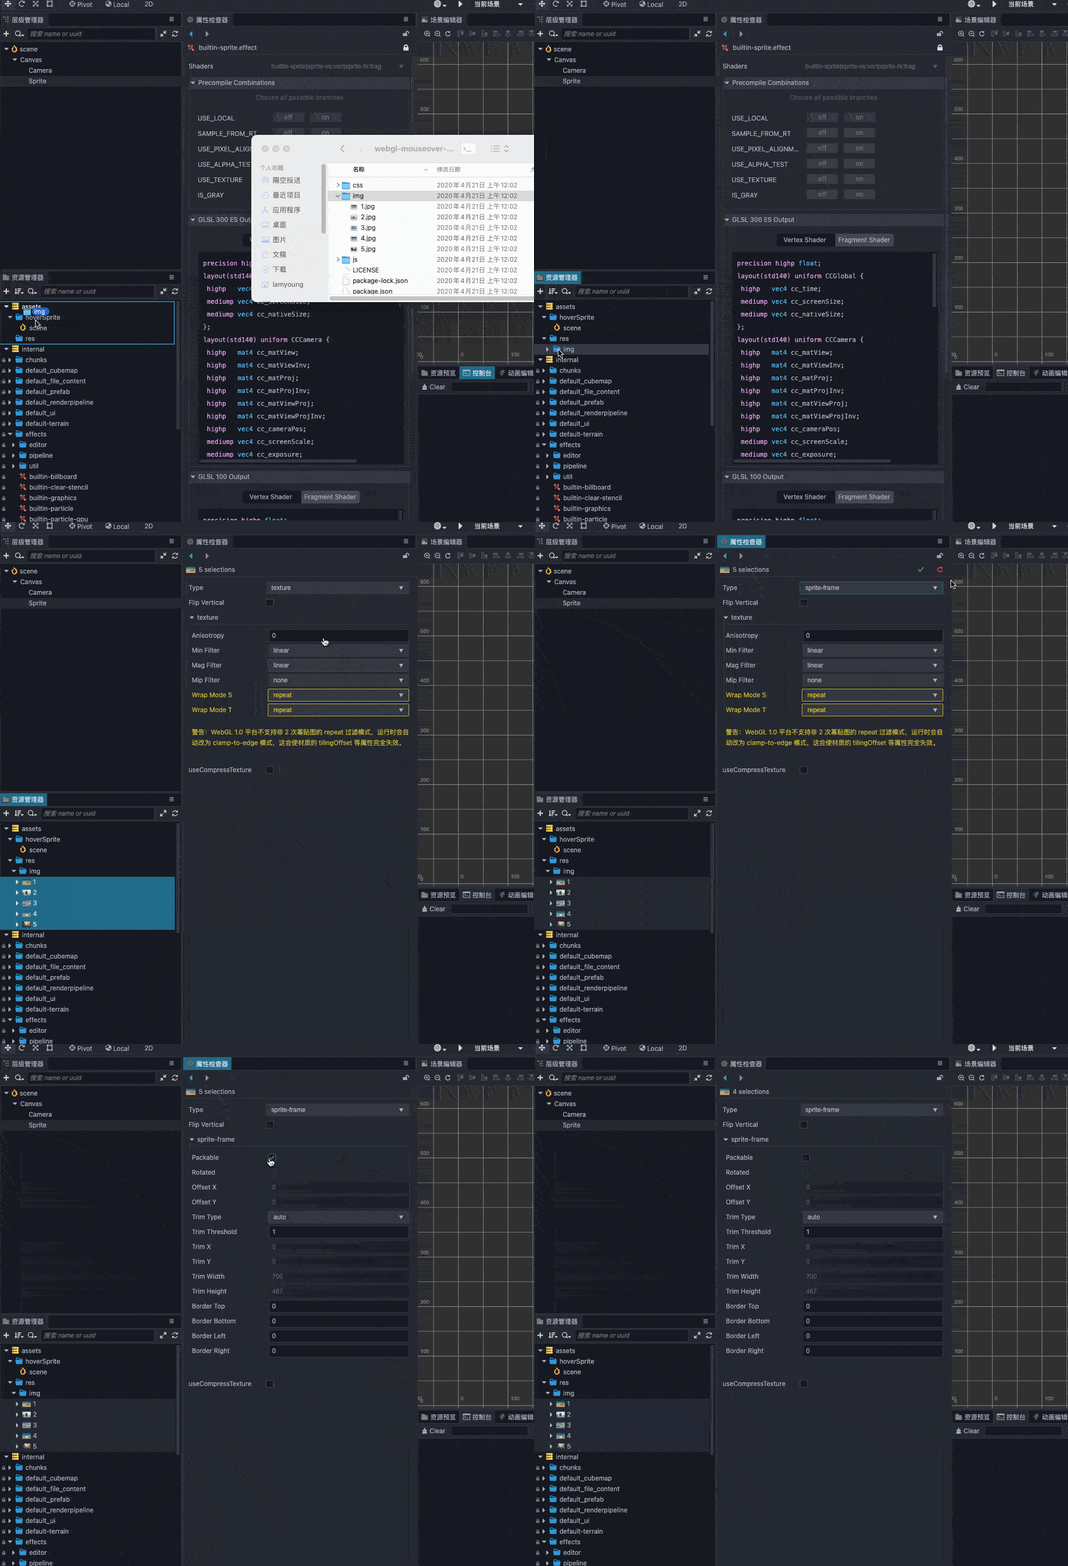
Drag a picture resource into the sprite node.
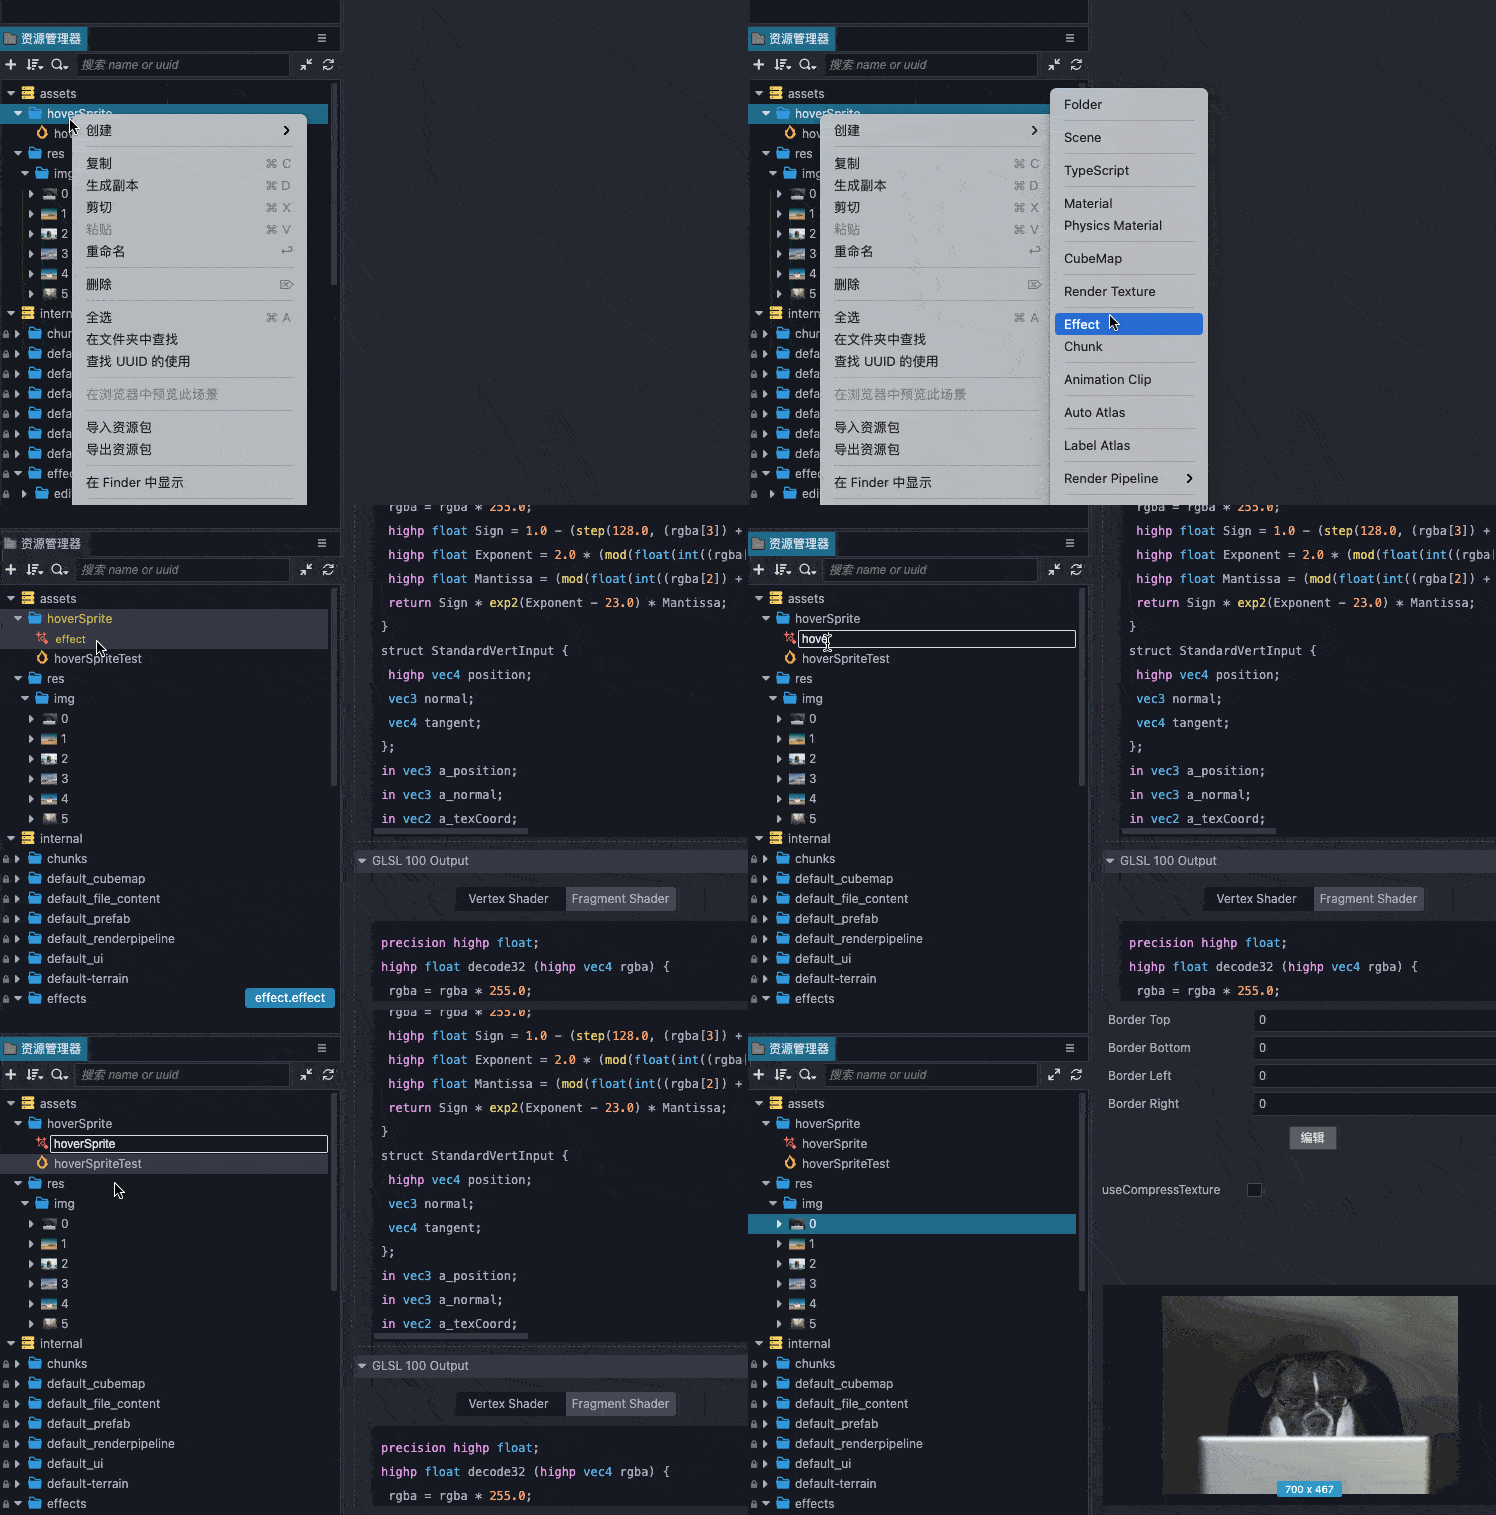
Create a new effect. Name it HoverSprite
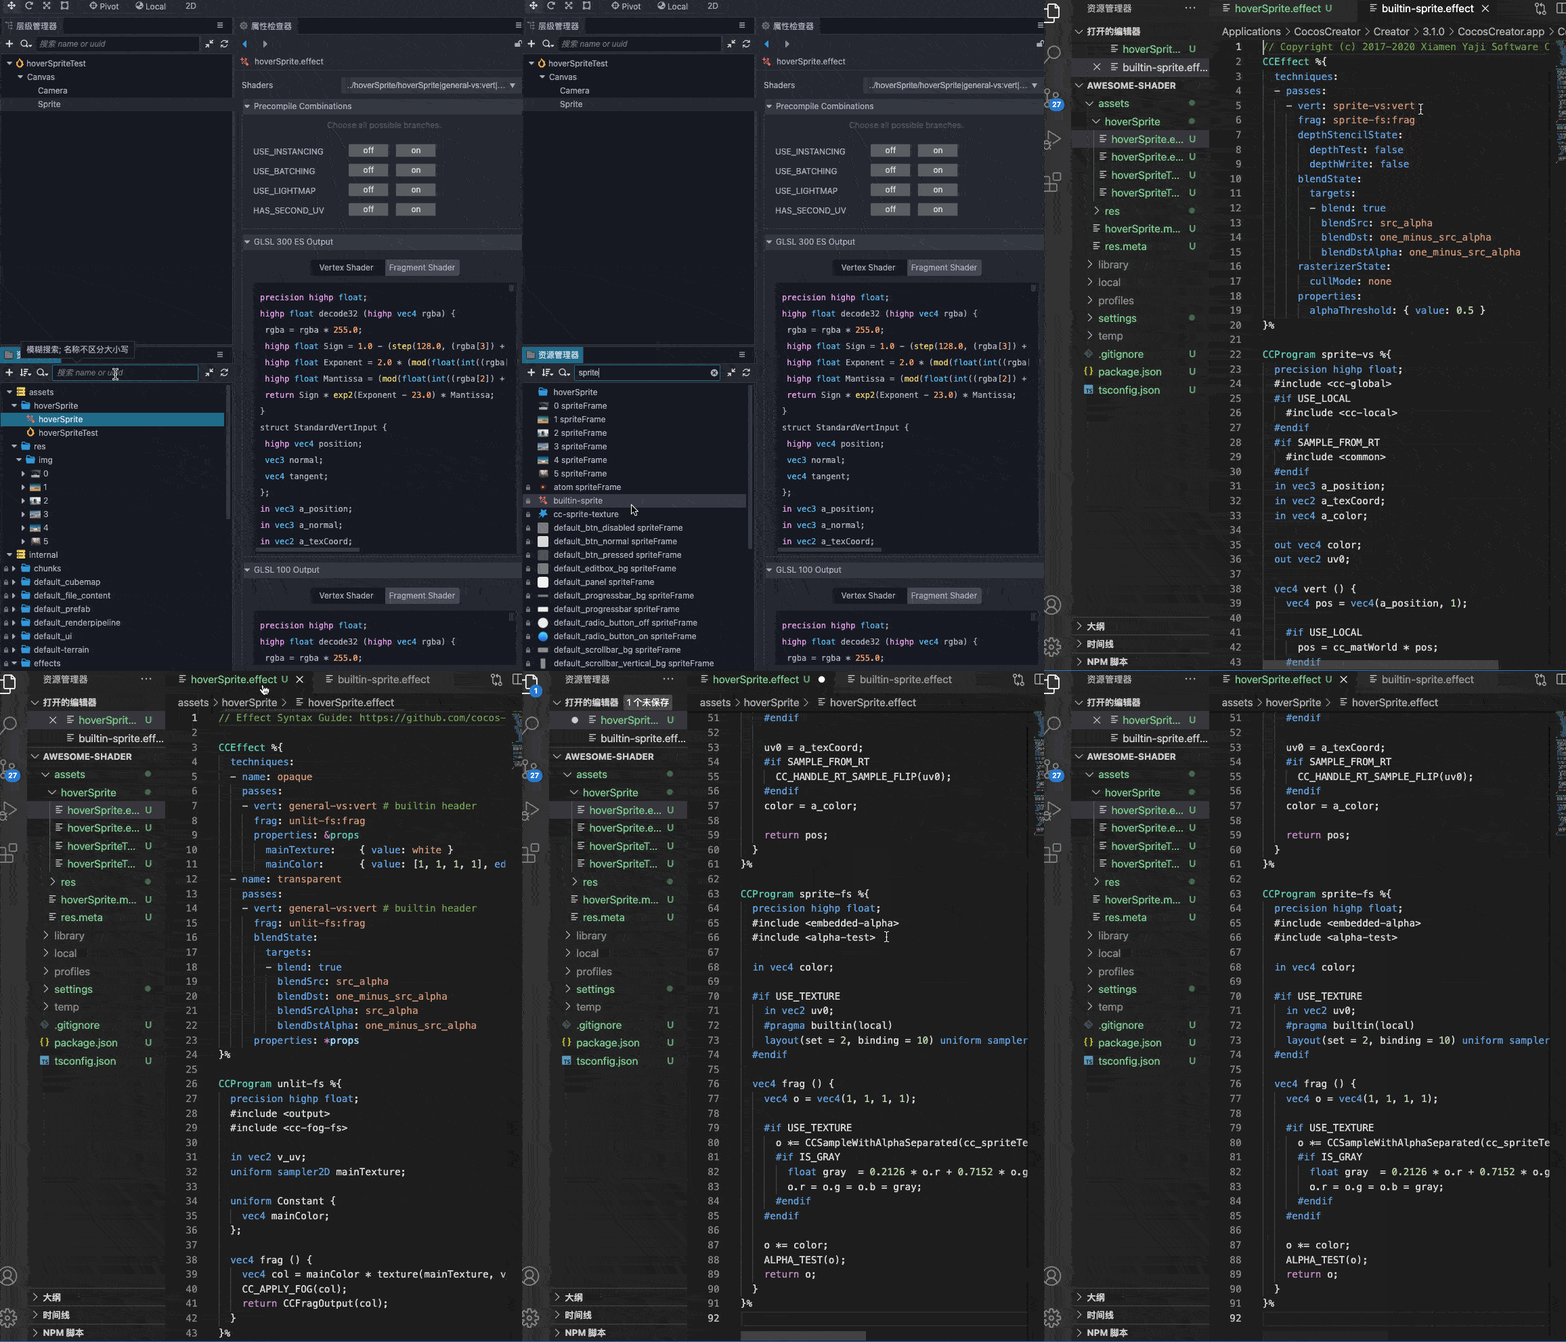
Find the template builtin-sprite and copy it to the effect you just created.
Create a new material hoverSprite, select it, in effect, tick the TEXTURE we just built. Tick USE TEXTURE.
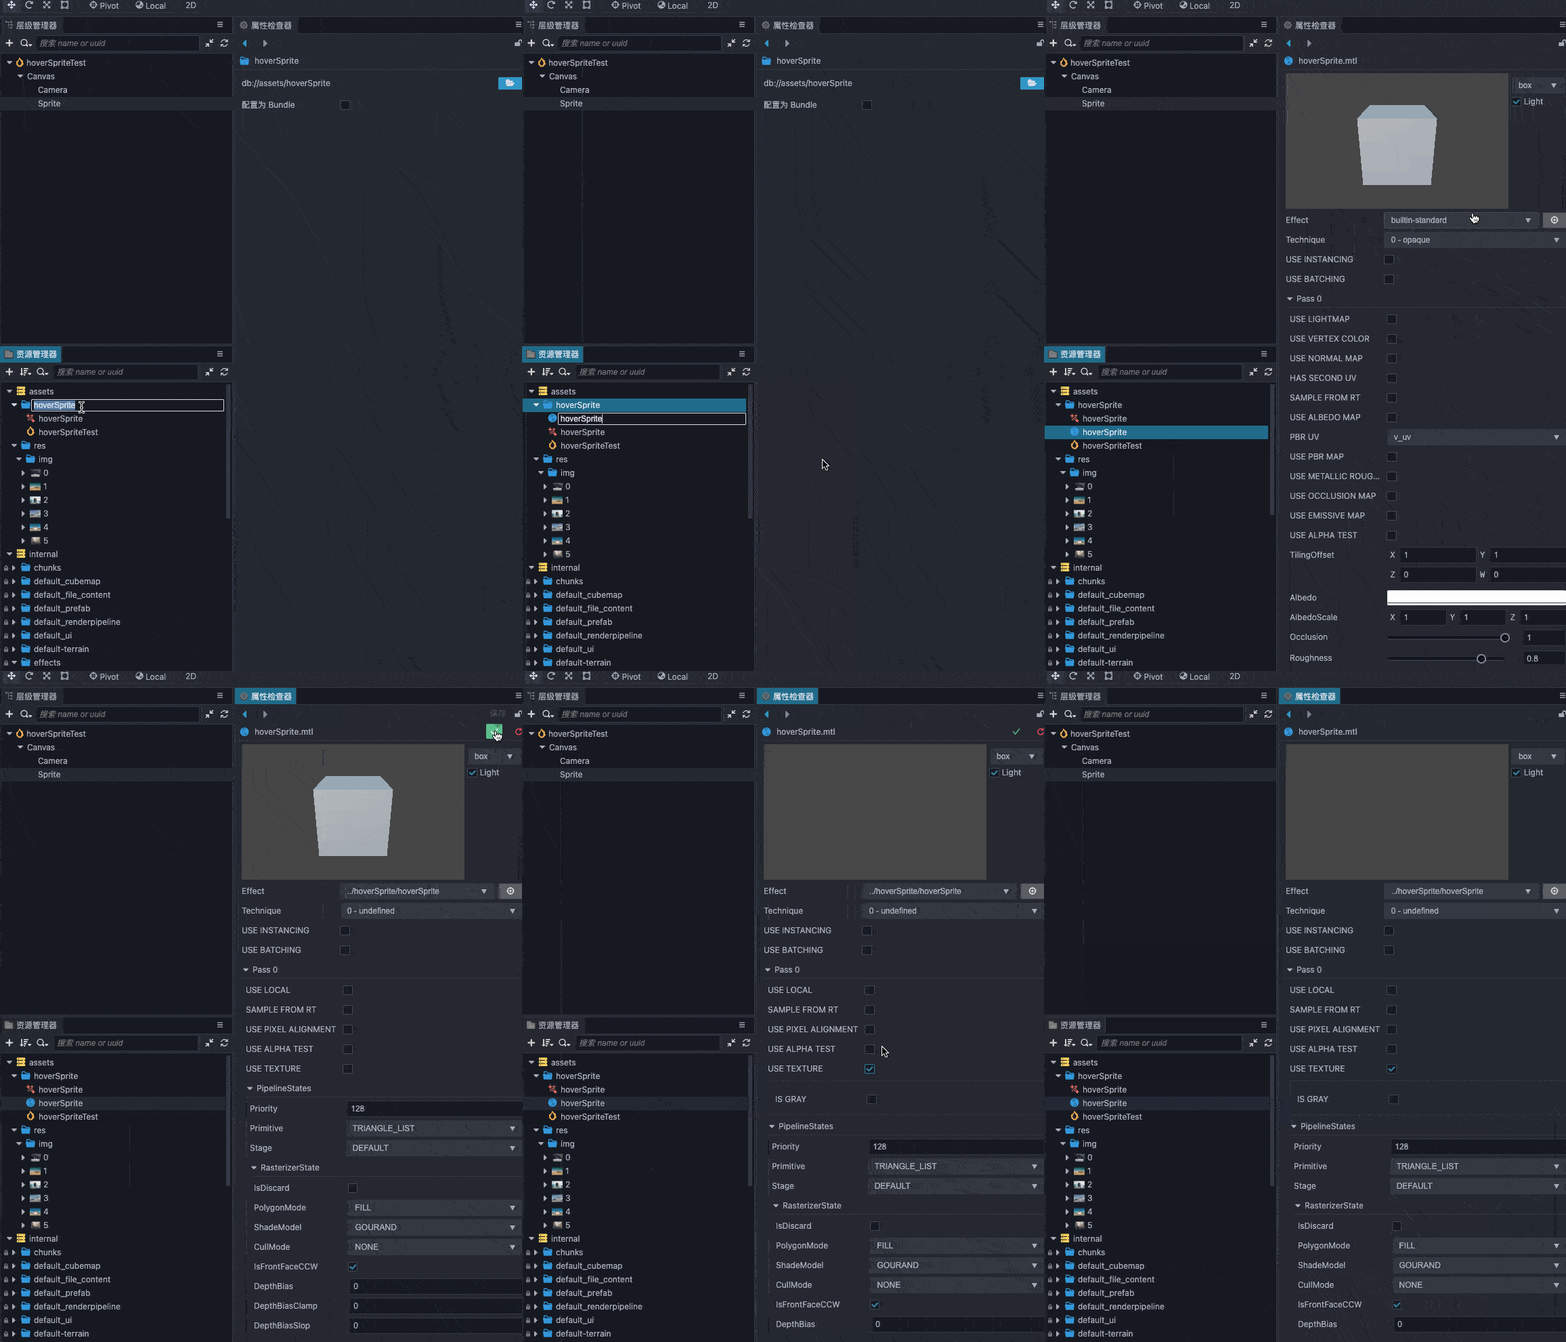
Drag the hoverSprite material into the Sprite Node’s CustomMaterial of cc.Sprite.
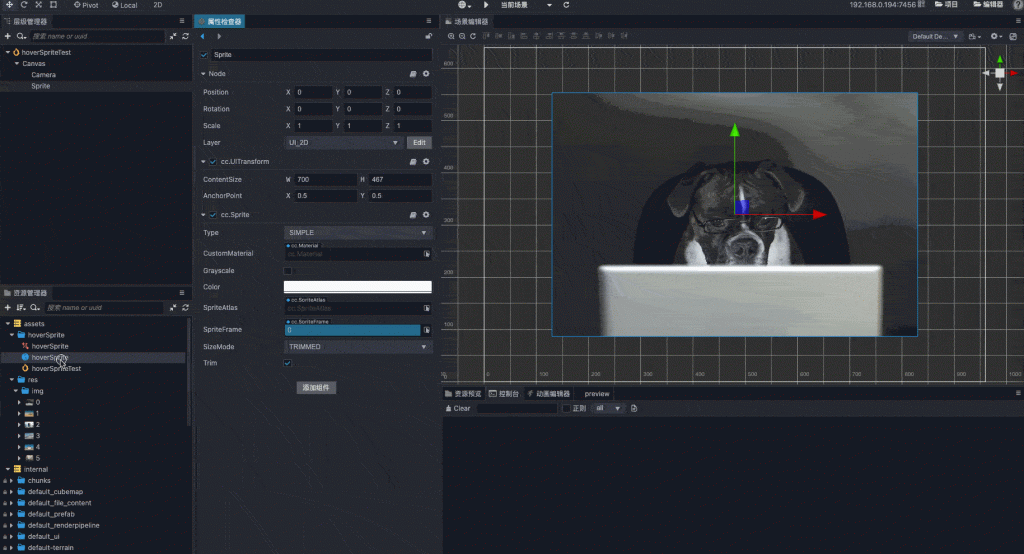
Basic Realization
Next, start writing effect.
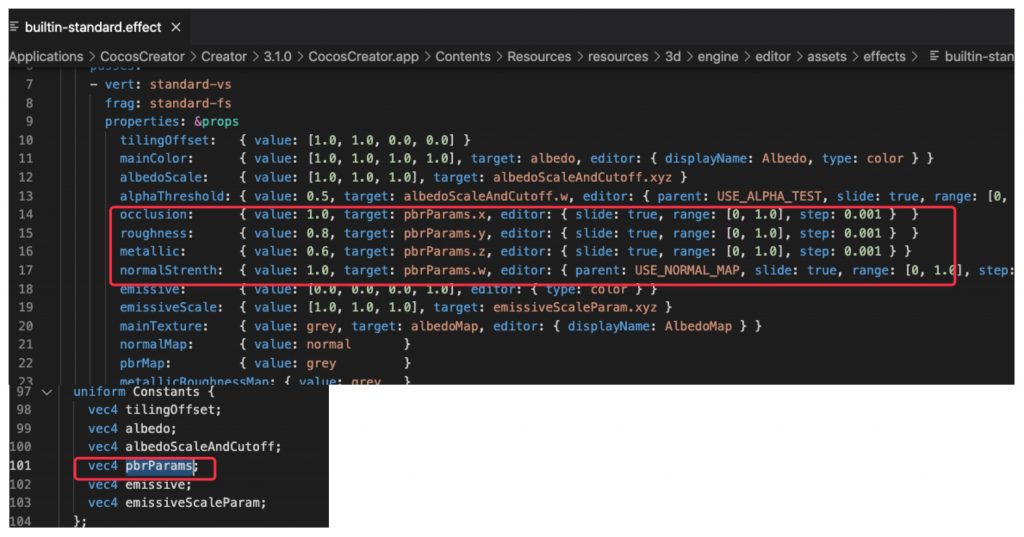
Let's deal with the uniform part first and see how many sources there are in uniform.
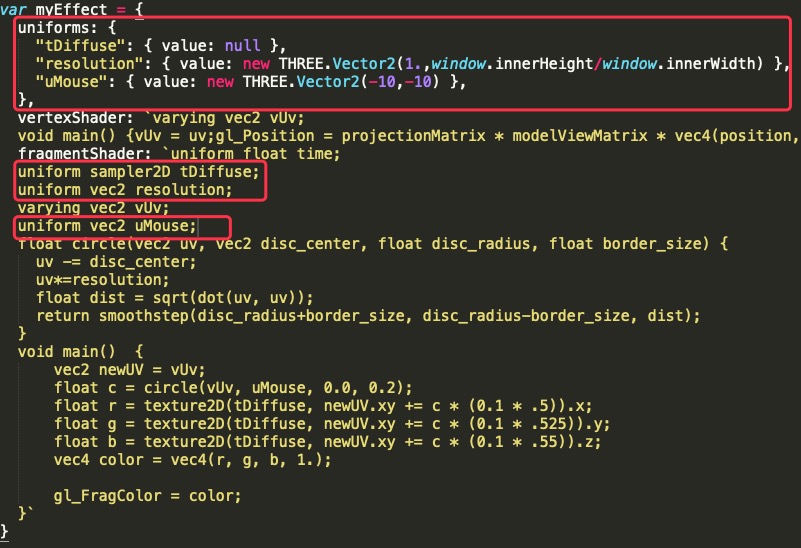
Refer to the builtin-standard.effect section defined in uniform.
In the effect, define uniform.
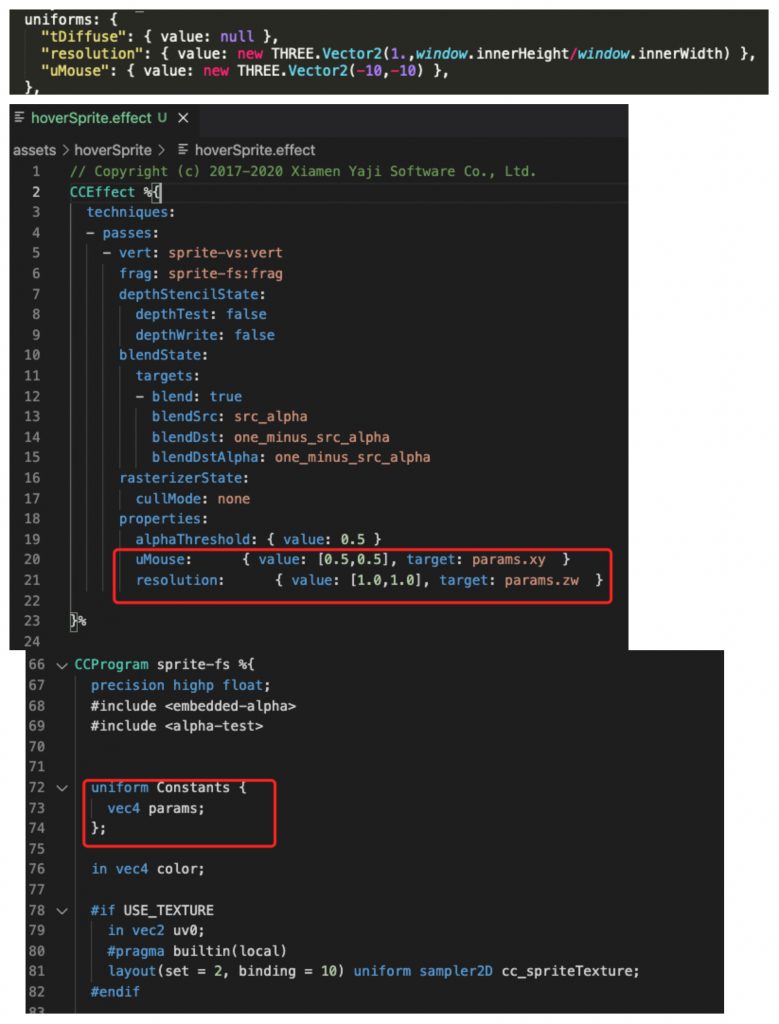
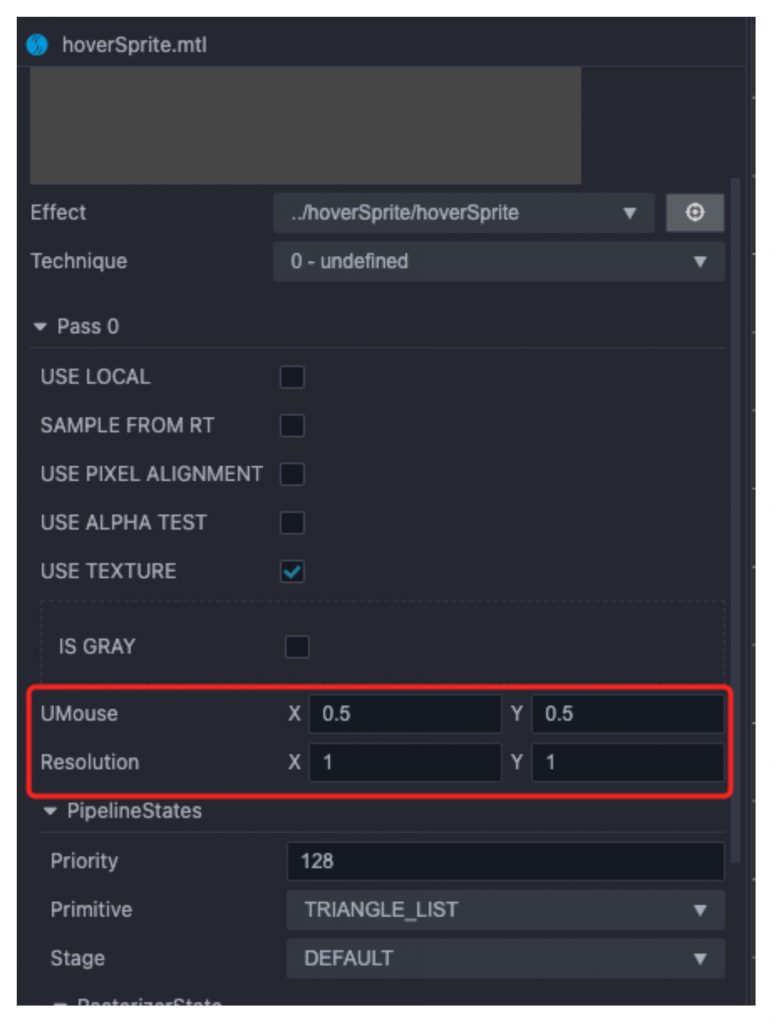
After writing, you can see the attributes just defined in the edited material.
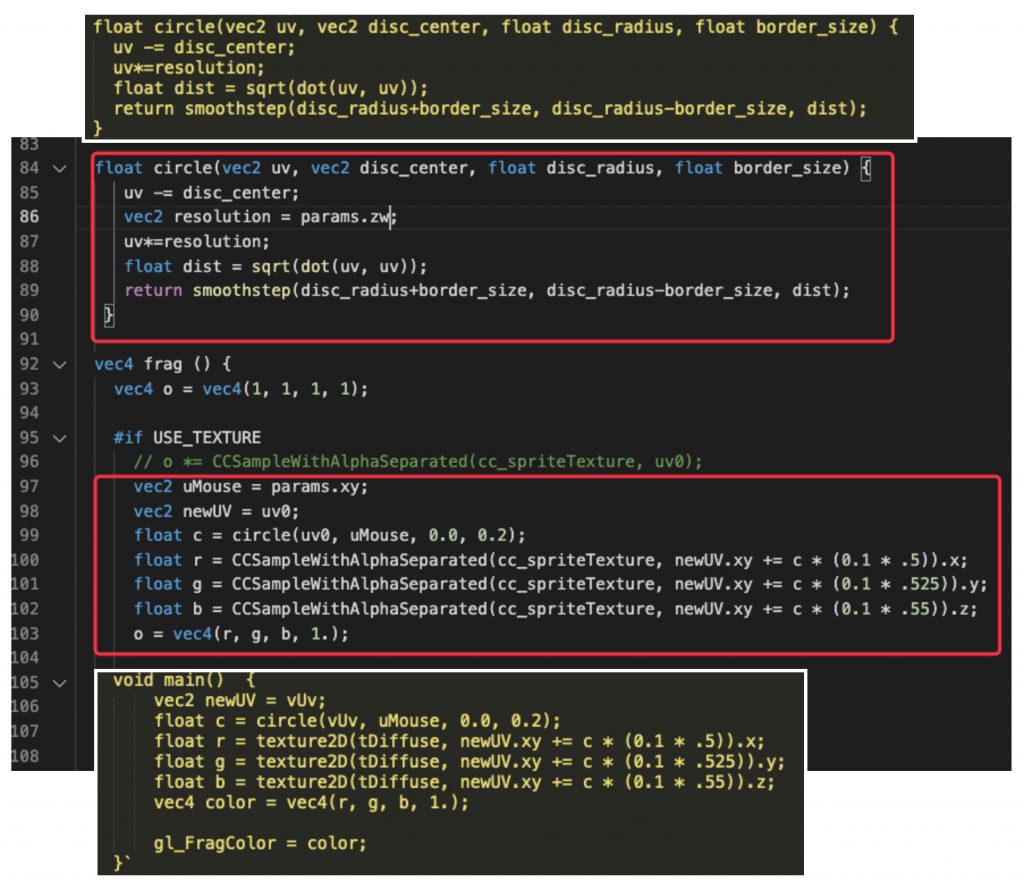
Next is to copy the fragment shader parts from the example above ( https://github.com/akella/webgl-mouseover-effects/blob/master/js/step1.js). Most of the syntax here is understandable.
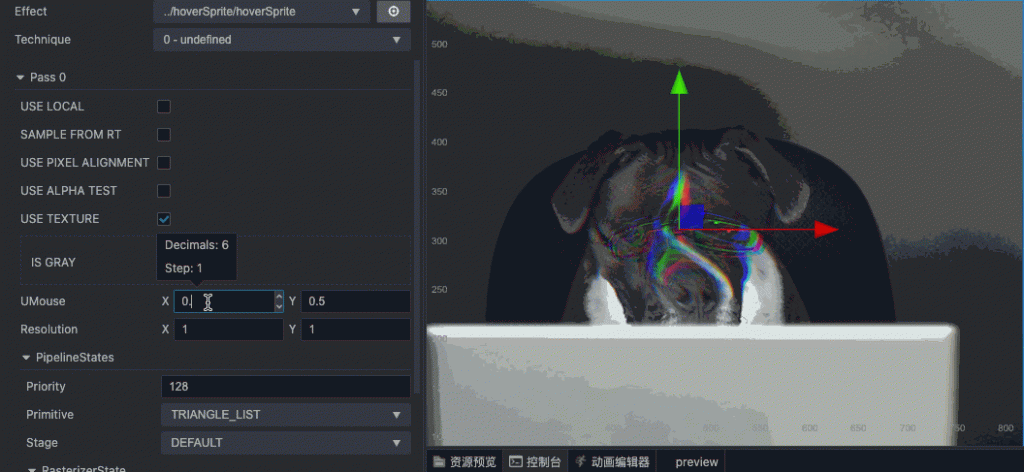
Change the parameters in the editor, and you can see the preliminary results.
Script Control
Next, we add the effect of the following changes with the mouse.
First, create a new script named HoverSpriteTest, add a node to the project and mount this script in it.
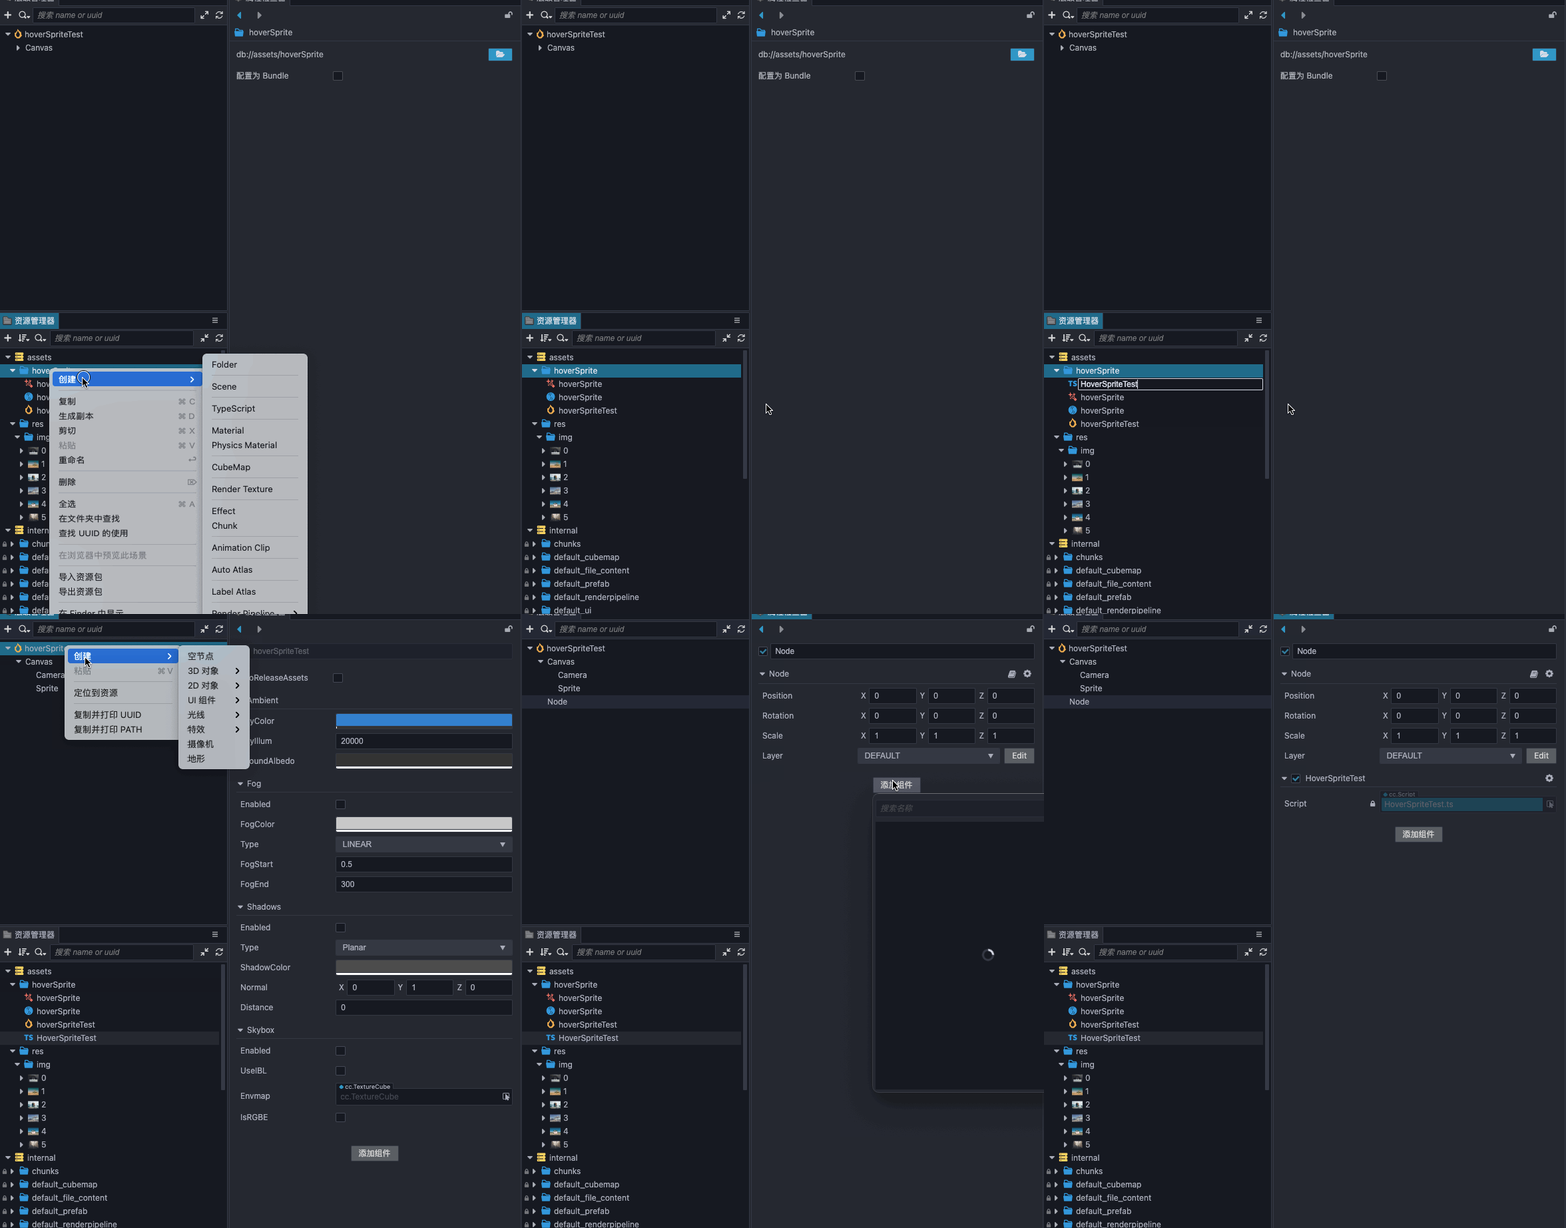
Add a sprite attribute to the script and bind the sprite in the scene.
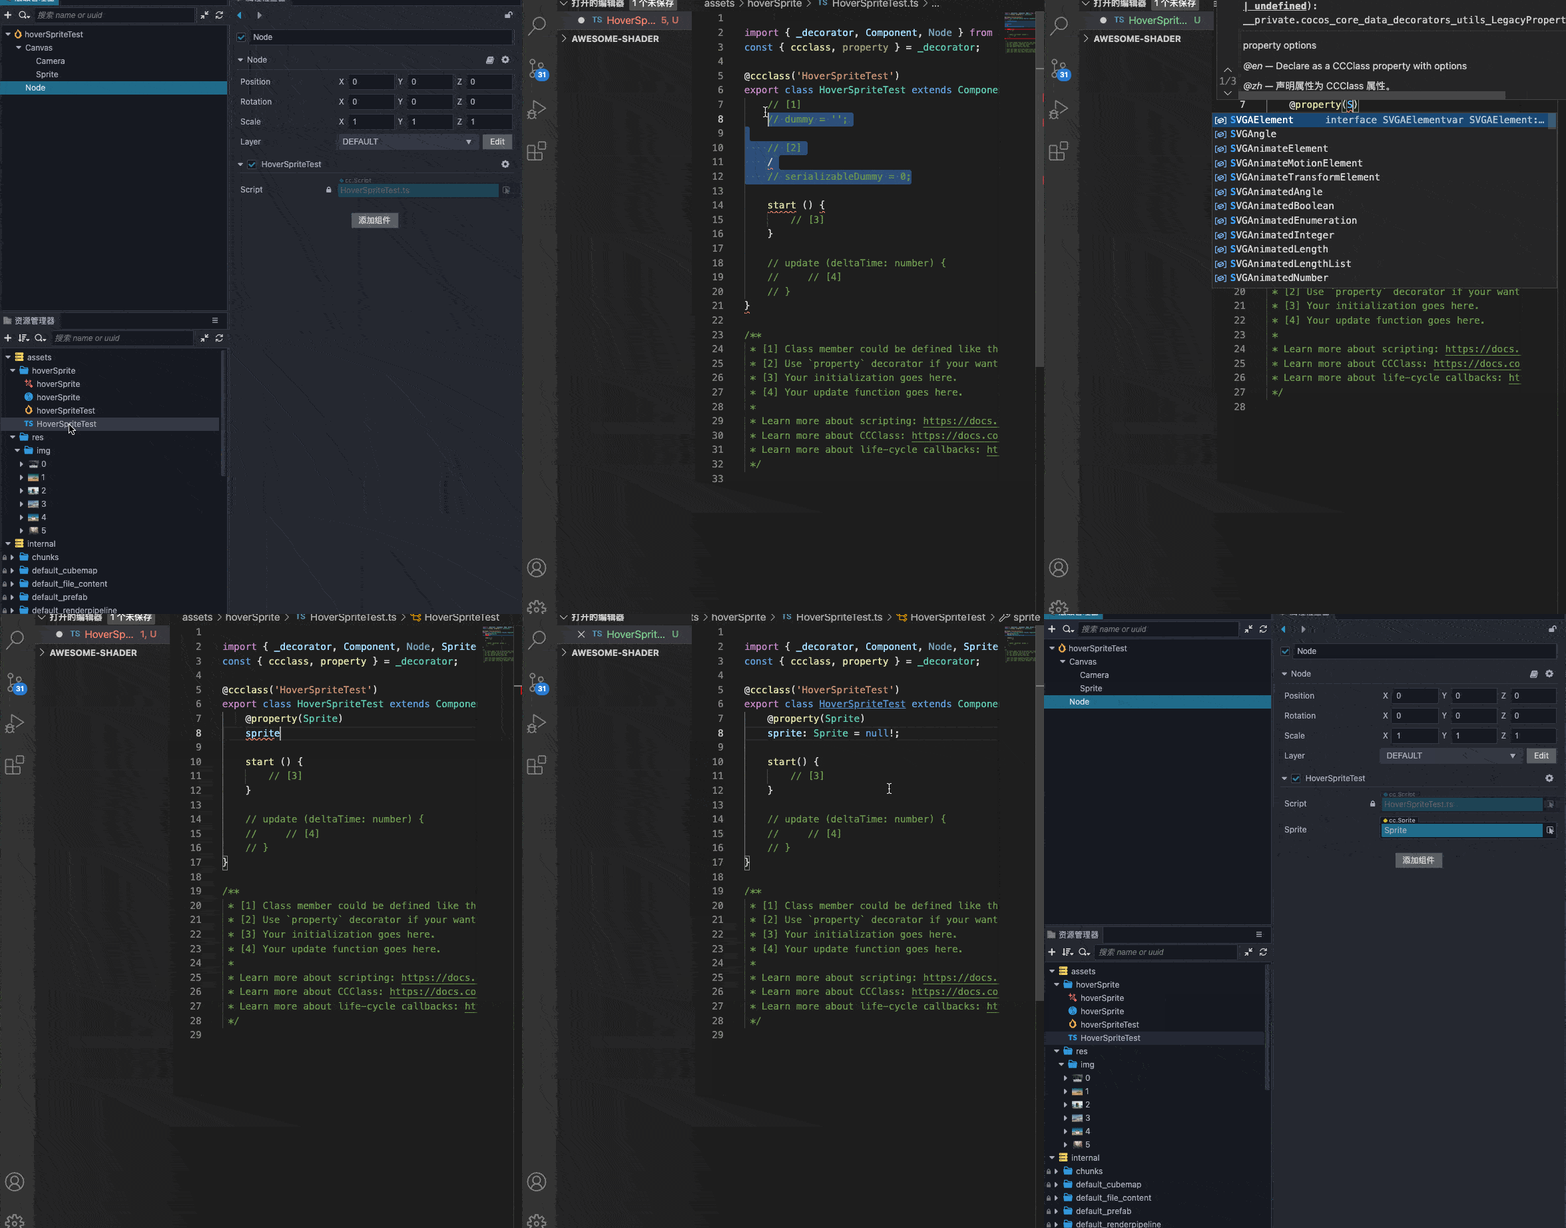
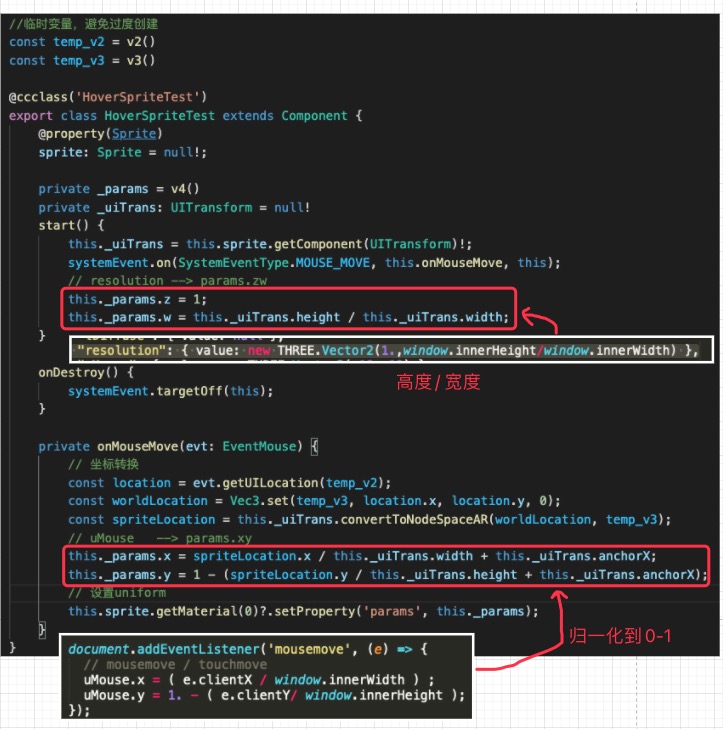
Then write the script logic
- Add mouse listener event
- Mouse coordinate conversion
- Process uniform variable transfer (reference source file for numerical logic):
- resolution is the aspect ratio
- uMouse It is the normalized value of the relative width and height of the mouse with the upper left corner as the origin
Finally, write a button to switch the sprite picture, and the final effect will be achieved.
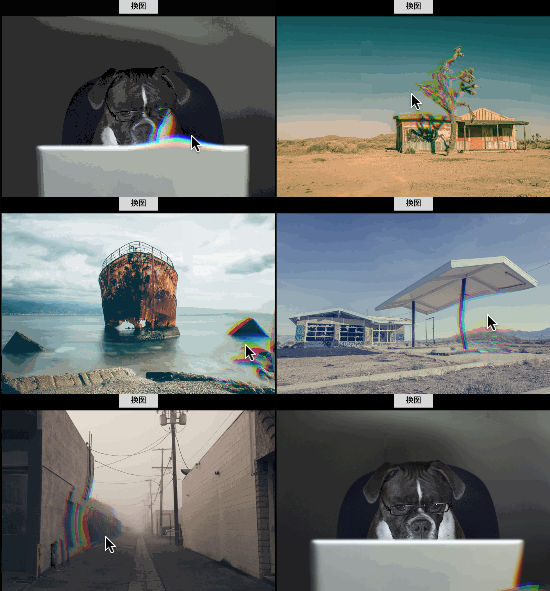
Final version available
Try this out and learn more from my Github project. Thanks for reading!
https://github.com/baiyuwubing/cocos-creator-examples/tree/master/awesome-shader
Where to Find Shaders?
Supersuracoon supplies us with a great list of places for shaders, or you can purchase his add-on from the Cocos Store. English version is promised in the future.

