Games with a simple task as jumping a jump rope and putting a ball in a hoop can seem quaint and uninteresting. But with the rise of hypercasual, these simple games are starting to grow and developers are finding new ways to make it fun.
One great example of this is Flappy Bird, a game developed by Vietnamese developer Dong Nguyen in 2013. It became a smash hit of the year even though the whole game is about tapping the screen at the right time to go past two pipes. It's now a part of gaming history and you can build it yourself!
In this tutorial, we're going to show you how you can build your own so you can customize the game it and build from the game. We have to thank game developer HuJun from our Chinese forum for the creation of the tutorial and Jason Slack-Moehrle for the translation of the tutorial.
Play a demo!
You can play a working demo online!
First, ensure that you have Cocos Creator installed and running. Next, download the game resources (https://zzxgame.com.cn/FlappyBirdRes).
Cocos Creator supports the development in two scripting languages, JavaScript and TypeScript. If you have experience with c++, perhaps using/learning TypeScript may be a good idea as it is a strongly typed language. You can learn about the advantages of TypeScript compared to JavaScript on your own.
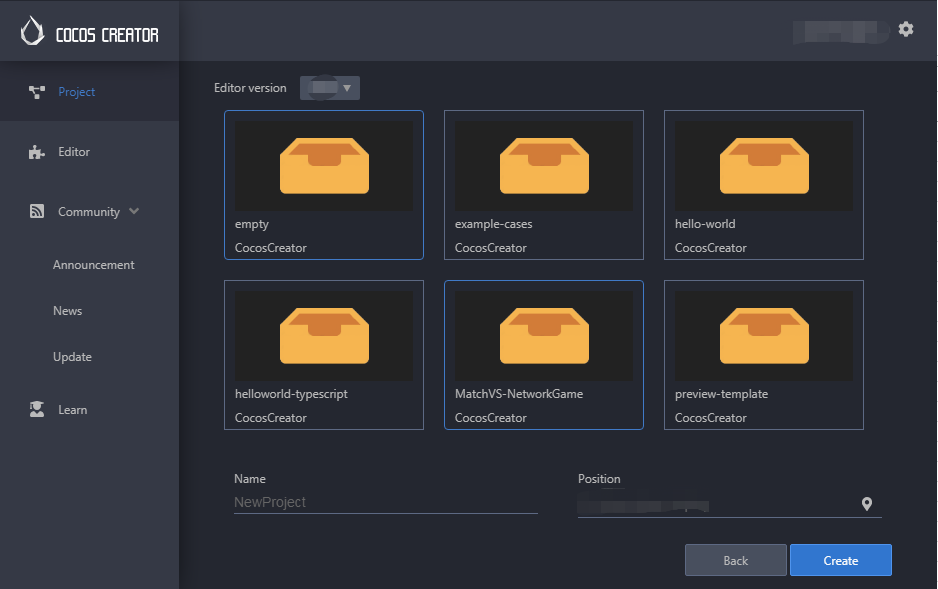
Open Cocos Dashboard and go to the Project area.
Second, select Hello TypeScript, then browse and select the directory where the project will be placed, and last, click New Project.
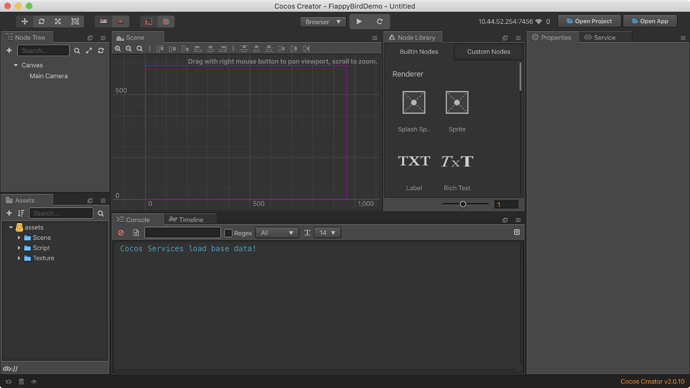
This is the IDE interface. First of all, we need to close the module of the control library. This library does not need it to be displayed. It takes up too much space. Clicking the button in the upper right corner of the control library will pop up two options, one is pop-up and the other is close. Select close here and it will be OK.
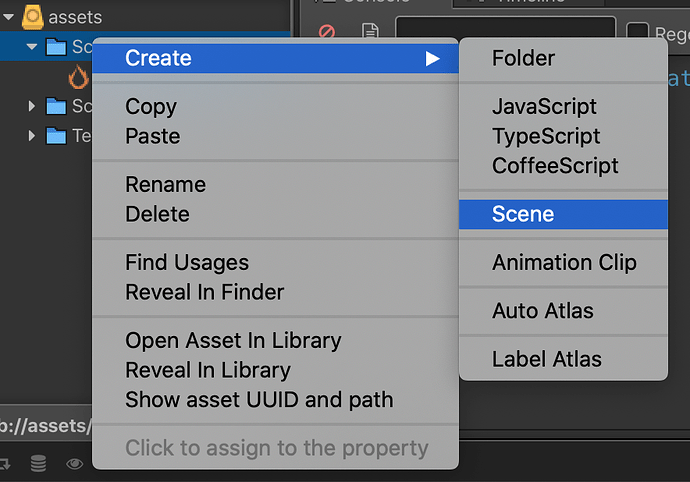
Third, find the Scene folder in the lower left corner of the Explorer. Select the Scene folder with the mouse, right-click to create a Scene, rename it to main. Double-click the main scene file. As shown:
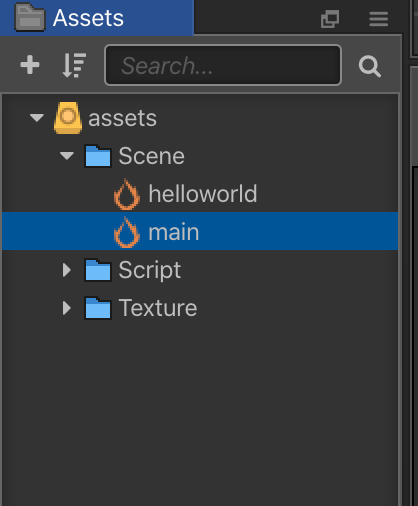
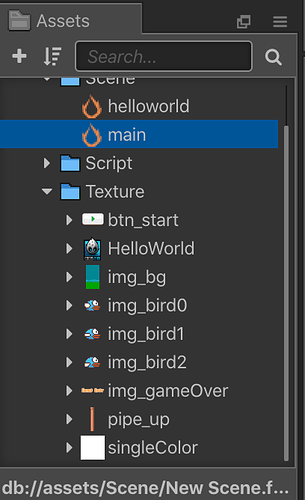
Last, put the resources needed for this game into the project folder \assets\Texture. Return to Cocos Creator and find all the resources listed in the Explorer:
The Bird
After the above preparations are done, let’s create the main character bird.
First, find the Canvas node in the hierarchy manager and create a new Sprite Node. Example:

Second, select it and rename it Bird.

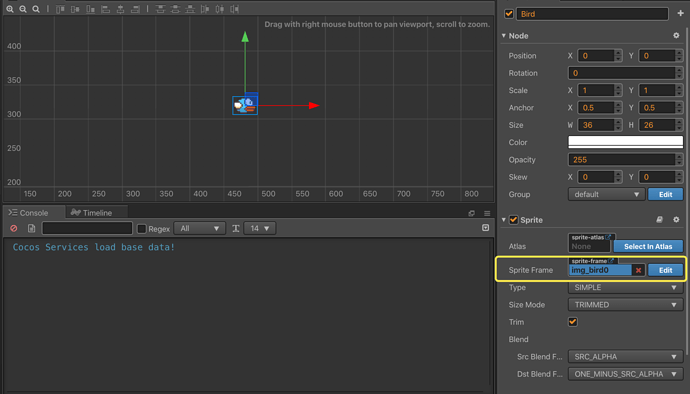
Third, select the Bird sprite to add image textures, and select img_bird0 under the Texture directory in the Explorer (do not click!), hold down the mouse and drag to the blue place on the right side of the Sprite Frame item in the lower right of the Property inspector and release the mouse. This way we can see the Bird in the scene editor:
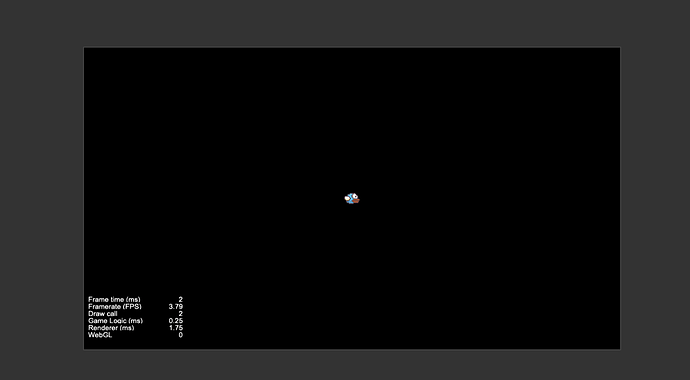
Last, press the Browser button, (directly above the middle of the IDE), and then click the triangle symbol button on the right, so we can see the Bird in the center:

A few tips
- The mouse is within the scope of the scene editor, the scene can be zoomed in and out by the mouse wheel.
- After zooming in or out, the node we want to see is often not in the middle of the scene editor. Select the node, and then use CTRL + F so that the IDE will automatically move the selected node to the middle of the scene editor.
- Every modification changes the project. CTRL + S saves the current scene. It is always a good habit to save often.
Animating the bird
How about we make the wings move through frame animation? This will give the illusion that the bird is flying.
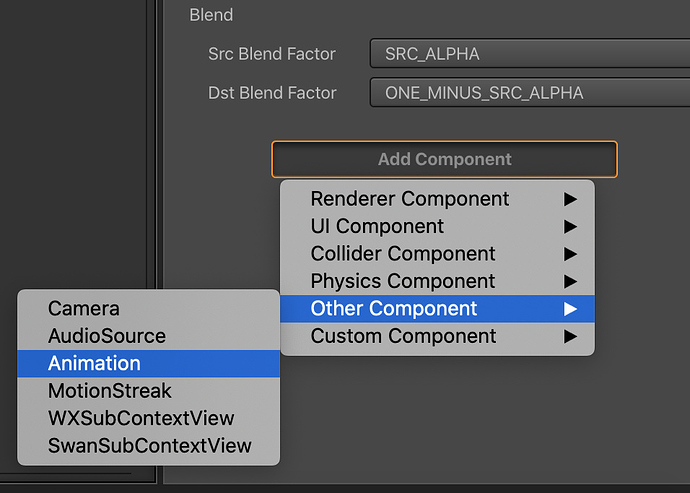
First, find the Bird node in the hierarchy manager and click on it. Either use the Add Component button at the bottom of the Property inspector or right click on the Bird node. Add an Animation component. Example:
Second, select the assets directory in the Explorer and right-click to create an Animation folder (used or storing animation files). Next, click the Animation Editor next to the console, so you can see the following interface, as shown in this figure:

Third, click the New Clip button. Choose the Animation folder created above and name the animation BirdAnim. Example:
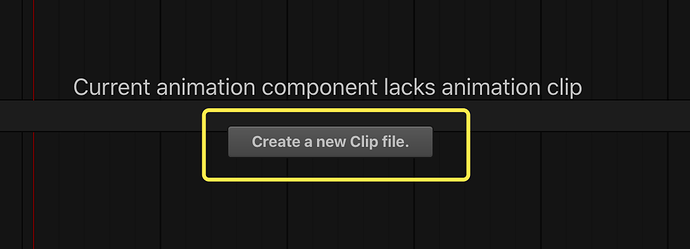

A BirdAnim file will be displayed under the assets\Animation folder.
Editing the animation
Click on the top-left button of the Animation editor to start editing the animation.
First, we click the Add Property button, select cc.Sprite.spriteFrame and a new option will appear in the property list. At the same time, a red line appears on the right side. This line is called a track.
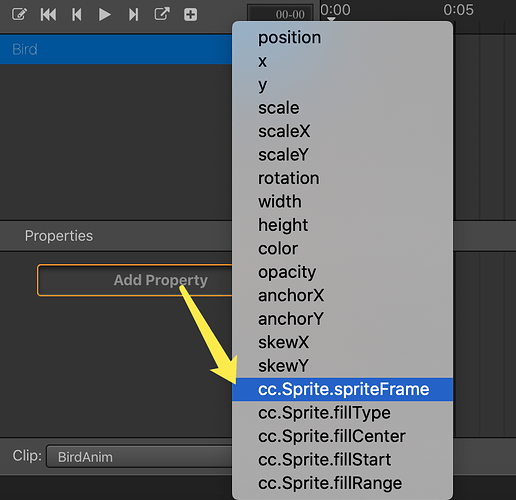
Next, select the 3 bird pictures in the Texture folder and drag them to the red track line together.
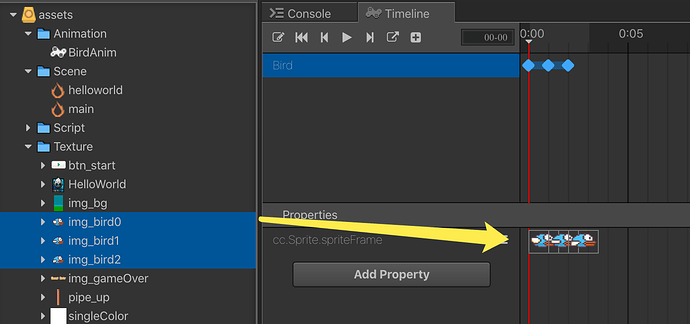
Next, select WrapMode as Loop (the default is Default)
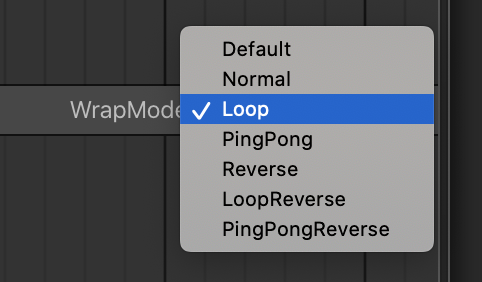
After the operation above, the interface shown in the figure above will appear. At this time, the three pictures are overlapped and it is not easy to observe. We can adjust the distance between the pictures by using the small diamond icon above. The switching interval between pictures changes, so this is also a way to adjust the frame animation interval. Example adjustments:

The Duration in the lower right corner changed from 0.07s to 0.35s, indicating that the switching interval between the three pictures has become longer. Click the Play button and you can see that the bird’s wings are constantly fanning up and down in the scene editor.
However, this animation looks a bit awkward. Notice, after the animation is played to the third frame, it is immediately replayed from the first frame, and there is a missing wing movement in the middle, which is a bit weird.
To fix, we add another frame to the animation. Example:
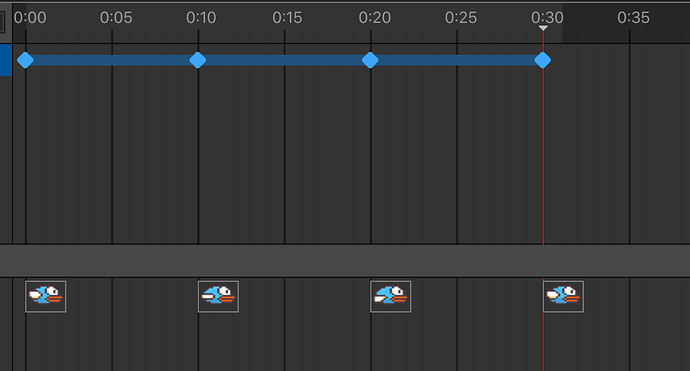
If you play it again, you can see these adjustments make the animation smoother and more realistic.
Save your progress
Find the Save button in the scene editor. Click Save once, and then click the Close button located next to the Save button.
So where are we?
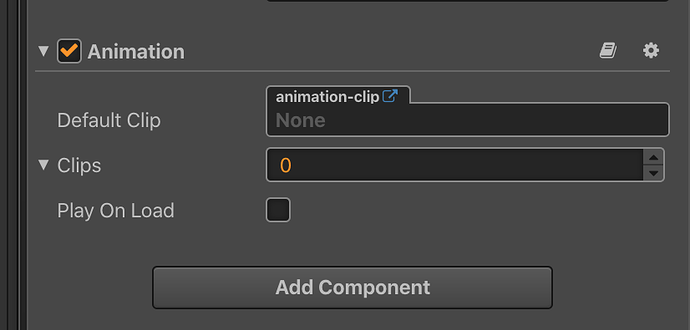
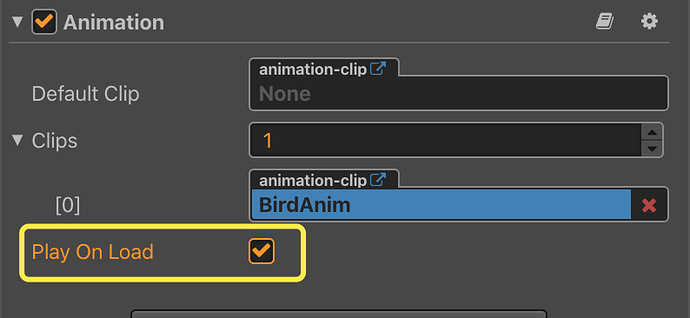
At this step, the Animation display in Bird’s property inspector should look something like this:
Testing our progress
First, check the Play On Load option and click Run. You will find that the bird is not moving at all. After reading the documentation you would realize that the default clip played is Default Clip. From the figure above, we can see that this item is None.
Second, manually drag the BirdAnim animation file in \assets\Animation directory to the Default Clip, as shown below:
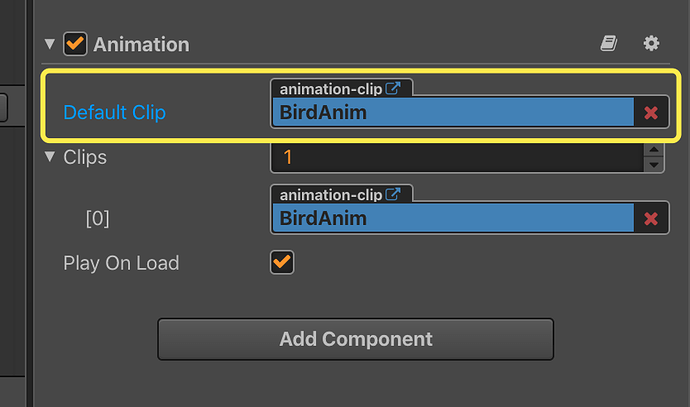
Lastly, save your work first and then run to check the results.
We finally see that the bird is flying happily!!
Add a background
Currently, our Bird just flys against a dark background. Let’s make the world our Bird lives more enjoyable for it.
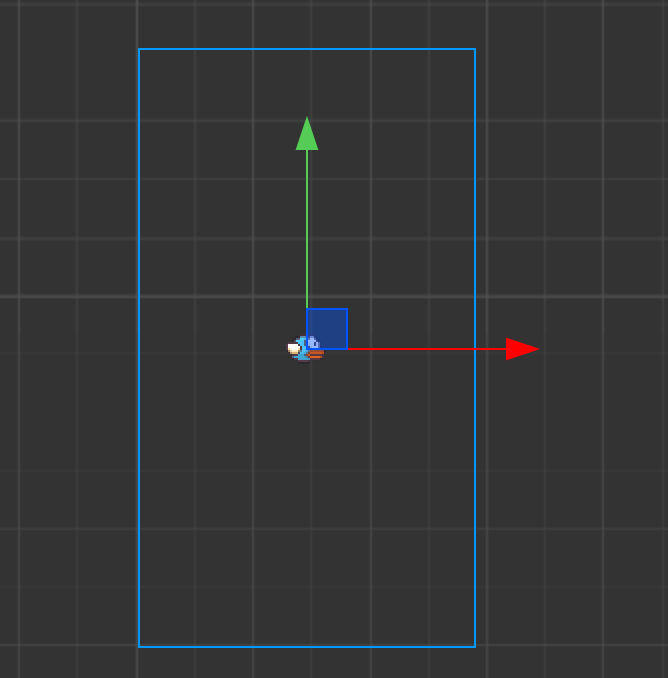
First, click the Canvas node and change the Canvas’s Design Resolution property to 288 and 512 in the Property inspector. This changes the resolution of our game to 288 x 512? Why this size? Simple, the background image is this same size. We can see the results:
Note: It is crucial to understand the importance of Canvas node is. Please make sure to read the Canvas Node documentation

Second, select the Canvas node, right-click -> Create Node -> Create Render Node-> Sprite, and rename it to Bg.
Next, drag the \assest\Texture\img_bg image into the Sprite Frame option on the right. Example:
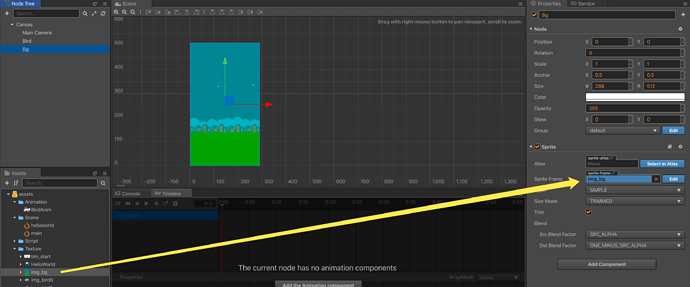
You can now see a background image in the Scene Editor but notice the Bird is gone. It’s not actually missing! It is just covered up with the new background image. This is because of a concept called z-order. Basically, node objects are rendered in the order they are added to the node-tree. Since the background was added second, it is rendered after the bird, therefore covering it up.
Note: Understanding Node tree is important. Please make sure to read the Node Tree documentation
Last, let’s fix the order of out nodes so that the bird displays in front of the background image. Very simple, select the Bg node and drag it up above the Bird node. Example:
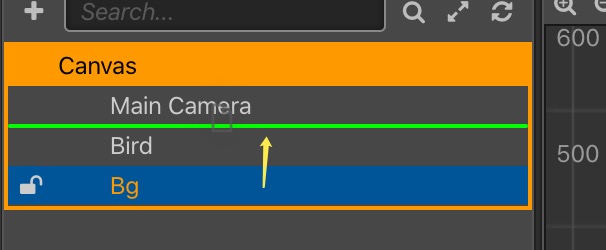
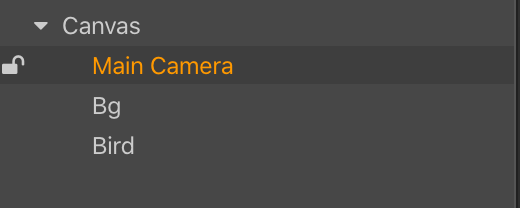
After dragging, you can see the Bird.
Save your progress
Find the Save button in the scene editor. Click Save once.
Have the background scroll
This section is about starting to write code to make this game more playable and start to feel like a game.
We will use code to make the background scroll. We need to create two background images to scroll through the screen to avoid wearing them.
First, we create an empty node named Background, then put it onto the Background node, and rename it to SpBg0. Next, Right-clickSpBg0 -> Copy, and select the right side of the Background node -> Paste. You can see that there are two SpBg0 nodes as children of the Background node. Last, rename the second node below to SpBg1. As shown in this figure:
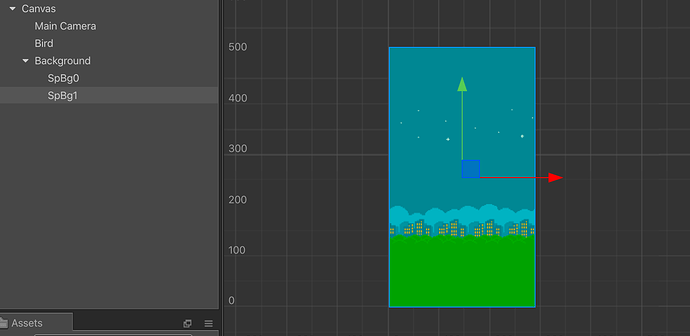
Third, The two background images overlap and come together. First, change the horizontal coordinate of the SpBg1 node to 288. To do this, click the SpBg1 node, and the Property inspector on the right will display the information for this node, find Position-X, and change it to 288. Example, as shown in this figure:

Adding code
At this point, you can see two background images in the scene editor.
First, create a new script file and rename it to MainControl. Example:
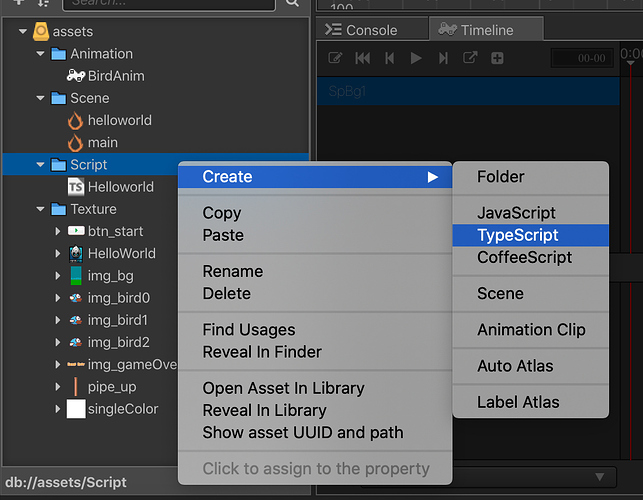
Second, attach the MainControl script to the Canvas node, as follows:
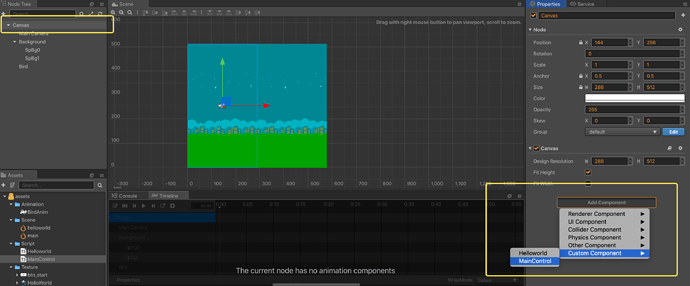
At this point, the interface should look as follows. Example:
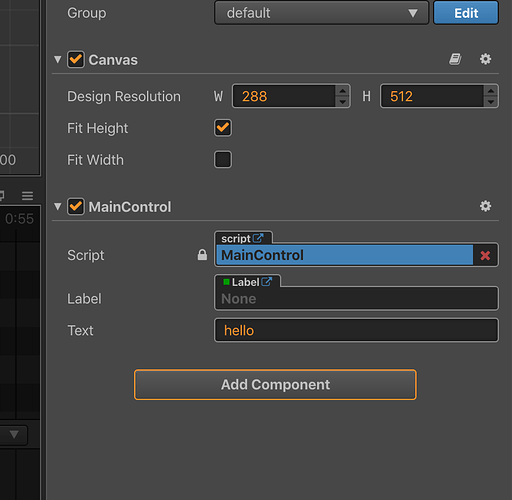
The MainControl script is now attached to the Canvas node.
Third, modify MainControl.ts and add the following code:
const {ccclass, property} = cc._decorator;

@ccclass
export default class MainControl extends cc.Component {

    @property(cc.Sprite)
    spBg: cc.Sprite [] = [null, null];

    // LIFE-CYCLE CALLBACKS:

    // onLoad () {}

    start () {

    }

    update (dt: number) {

    }
}
The above code declares an array of type cc.Sprite. The array variable is named SpBg and has a length of 2.
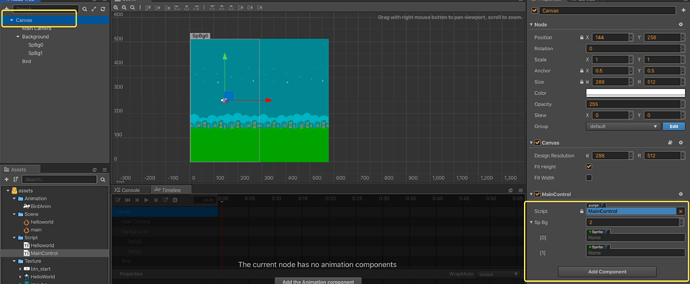
Fourth, drag the nodes SpBg0 and SpBg1 to the two Sprites in the script panel to associate them. The operation is as follows:
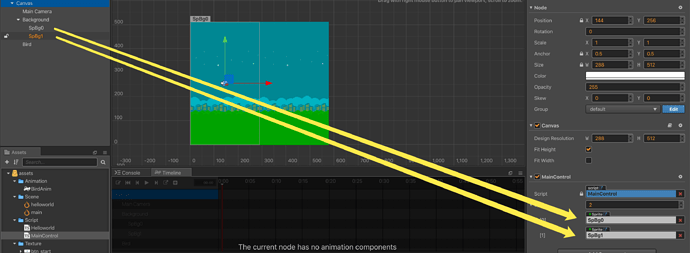
Fifth, save the current scene and double-click the MainControl script to add the following code:
update (dt: number) {
    // move the background node
    for (let i = 0; i < this.spBg.length; i++) {
            this.spBg[i].node.x -= 1.0;
        if (this.spBg[i].node.x <= -288) {
            this.spBg[i].node.x = 288;
        }
    }
}
The update() function will trigger every frame of the game, which is one of the callback functions that Cocos Creator provides for the life cycle of the component script. Learn about the lifecycle callback functions for component scripts: life cycle callbacks
The code in update() is a simple for loop. The function implemented is to subtract the horizontal axis of SpBg[0] and SpBg[1] by 1 pixel. When the sprite has been moved to the left less than -288 set it back to 288 so it can slowly scroll to the screen on the right.
Save your progress
Find the Save button in the scene editor. Click Save once.
Touch events
The touch monitoring events (in fact, all built-in events are) is added to the node (cc.Node). When the node is interacted with, the callback function of the event will be triggered. At that time, the callback function is running. This callback is what we need to incorporate some touch events.
First, our game needs to respond to touch events in full screen, so we need to find a node that covers the entire interface. Perhaps, the Canvas node meets the requirements?
Second, create a BirdControl script and attach it to the Bird node to specifically control the bird’s game logic.
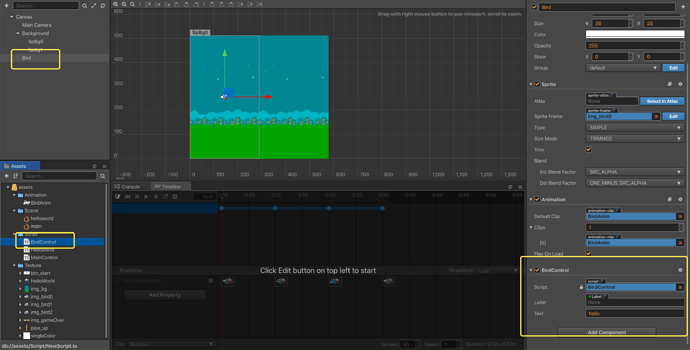
As shown above, after the script is attached. Next, double-click the BirdControl script to edit it:
const {ccclass, property} = cc._decorator;

@ccclass
export default class BirdControl extends cc.Component {

    //Speed of bird
    speed: number = 0;

    onLoad () {
        cc.Canvas.instance.node.on(cc.Node.EventType.TOUCH_START, this.onTouchStart, this);
    }

    start () {

    }

    update (dt: number) {
        this.speed -= 0.05;
        this.node.y += this.speed;
    }

    onTouchStart (event: cc.Event.EventTouch) {
        this.speed = 2;
    }
}
The first piece of code defines a speed variable to indicate the speed of the bird in the Y-axis direction. Positive values indicate upward flight, and negative values indicate the falling process.
The second piece of code, the onLoad() function is one of the life cycle callback functions provided by Cocos Creator. This callback function is triggered when the node attached by the script is activated for the first time. It is generally used to perform some initialization related operations. Line 24 is to add a touch event response to the Canvas node.
Let us talk about the parameters being used:
cc.Node.EventType.TOUCH_START - As you can see from the name, this event is when the touch starts.
this.onTouchStart() is our custom callback function.
this, is used to bind the caller of the response function. This parameter is important and must be provided.
The third piece of code, in the update() function, reduces the speed by 0.05 per frame. The bird is affected by gravity and needs to do an upward uniform deceleration motion or a downward uniform acceleration motion.
The fourth piece of code, the onTouchStart() function is our custom touch callback function. This function will be triggered when the mouse clicks on the game area. Each time this function is triggered, we increase the upward speed with a speed value of 2.
At this step, run the project. You will find that every time you click, the bird will fly up a distance.
Making our environment realistic
To make the acceleration and deceleration effects more realistic, we can tilt the bird up a little angle when it is flying upwards, and tilt it down an angle when it is falling. Let us select a maximum tilt angle of 30 degrees.
The implementation is simple, the code is as follows:
    update (dt: number) {
        this.speed -= 0.05;
        this.node.y += this.speed;

        var angle = -(this.speed/2) * 30;
        if (angle >= 30) {
            angle = 30;
        }
        this.node.rotation = angle;
    }
This code helps to create realistic effects!
Save your progress
Save your changes in the text editor that you are using. Find the Save button in Cocos Creator and click Save once.

